RZ-G/RZG2 Eclipse develop and debug
Introduction
In this page you'll find instructions on how to use Eclipse to develop, cross-build and debug for RZ/G2. Eclipse is a very well known IDE (Integrated Development Environment) that can be used to develop for different targets, supporting many programming languages.
Installation
There are many guides available online that describe how to install Eclipse on your host Linux machine, normally an x86 PC. For example, if you are using Ubuntu 20.04, you can follow the instructions included on this web page. Do not launch Eclipse after the installation.
Setting up the cross-build environment
Since the goal is to develop for RZ/G2 that are SoCs based on 64-bit Arm Cortex-A cores, you need to install the SDK. For more information on how to build and install the SDK for RZ/G2 you can normally refer to the Release Note of the BSP, the links can be found here. Once the SDK is installed, you have to setup the environment by launching the related script. The default installation path is: /opt/poky/[version] so, for example, in order to setup the environment to cross-build for RZ/G2L:
source /opt/poky/3.1.5/environment-setup-aarch64-poky-linux
If successful, you should be able to invoke the cross-compiler:
$ $CC --version
aarch64-poky-linux-gcc (GCC) 8.3.0
Copyright (C) 2018 Free Software Foundation, Inc.
This is free software; see the source for copying conditions.  There is NO
warranty; not even for MERCHANTABILITY or FITNESS FOR A PARTICULAR PURPOSE.
and also other tools like GDB.
Launching Eclipse
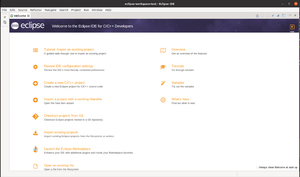
We are now ready to launch Eclipse. When you launch Eclipse for the first time, it asks to set-up a workspace, after that you should see a Welcome screen:
Hello World
In order to create your first Hello World program, click File -> New -> C/C++ Project. Then select "C Managed Build", next, select "Hello World ANSI C Project", give it a name (e.g. Hello) and select Cross GCC, next, next until the Cross configuration window appears. Then for "Cross compiler prefix" type aarch64-poky-linux- and "Cross compiler path" type /usr/bin. If you click finish a new project with the name give will be created. Now in order to get it correctly built, you need to adjust some build settings. Right click on the project, then Properties. When the setting windows pop-up, expand C/C++ Build and select Settings. Then select Miscellaneous under Cross GCC Compiler and add the flag: --sysroot=${SDKTARGETSYSROOT}. Similarly, for Cross GCC Linker: --sysroot=${SDKTARGETSYSROOT}


